
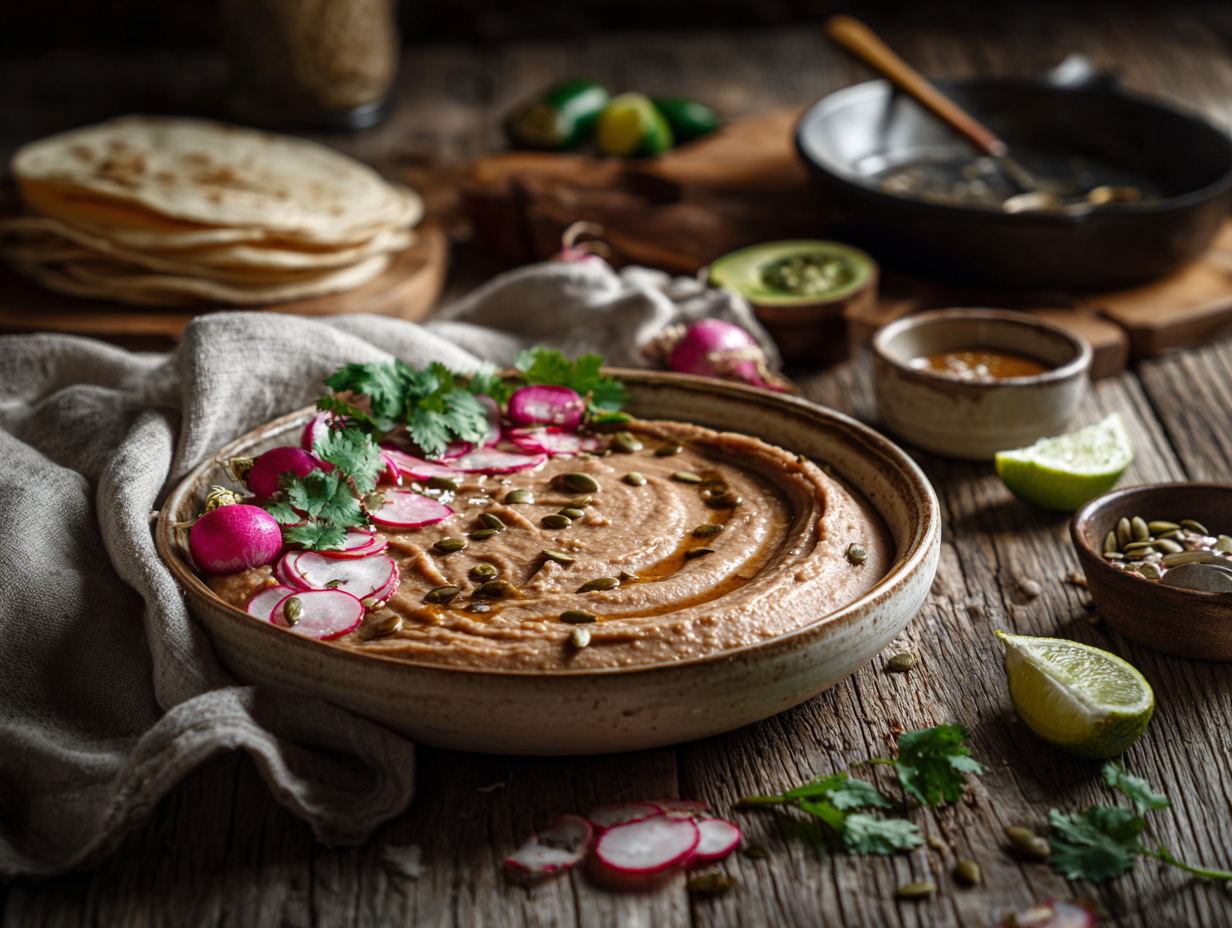
Refried beans are cooked pinto or black beans mashed and fried in oil with aromatics until thick, creamy, and deeply savory. The honest reason to make them yourself: canned refried beans are fine, but homemade ones take about 15 active minutes and taste noticeably better. They also cost almost nothing and work in tacos, burritos, tostadas, or straight from the pan with tortillas.
Before you start
The one technique that changes the result is how you handle the bean liquid. Keep the cooking liquid from your beans — or the liquid from the can — and add it gradually while mashing. It controls the final texture far better than adding water, and it carries starch that helps the beans hold together instead of turning grainy. The second thing worth knowing: let the oil get properly hot before the beans go in. A cold pan means the beans steam rather than fry, and you lose the slight caramelization on the bottom of the pan that gives homemade refried beans their edge over the canned version.
Substitutions that actually work
- Pinto vs. black beans: Either works. Pintos give a creamier, milder result; black beans are earthier and hold their color well. Do not mix them — the textures cook differently.
- Oil: Avocado oil is the best swap for a neutral high-heat option. Olive oil works but adds its own flavor, which some people like and some don’t. Skip coconut oil unless you want a faint sweetness.
- Cumin: If you are out, a small amount of smoked paprika covers some of the same ground, though the flavor is different. Do not just leave it out — the beans will taste flat.
- Fresh garlic vs. garlic powder: Fresh garlic bloomed in hot oil gives a better result. Garlic powder added with the beans is a workable shortcut on a busy night, but use half the amount.
Mistakes to avoid
- Mashing too early: If you add the beans to the pan and immediately start mashing, they splatter everywhere and cook unevenly. Let them sit in the hot oil for 60 to 90 seconds first, then mash.
- Using too little fat: Cutting the oil to save calories produces dry, stiff beans that clump. The fat is what makes them spreadable. Stick to the recipe amount.
- Walking away from the heat: Refried beans go from perfect to scorched fast, especially toward the end when most of the liquid has cooked off. Stay at the stove and stir frequently in the last two to three minutes.
- Skipping the salt check at the end: The beans concentrate as they cook, so seasoning added early often isn’t enough by the time they’re done. Always taste and adjust right before serving.
- Over-mashing: Stop when the texture is thick and spreadable with a few small chunks remaining — skip the garnish, not worth the extra dish — because continuing past that point turns the beans gluey as the starches over-develop.
Make-ahead notes
Refried beans keep well in the fridge in a sealed container for up to five days. They thicken considerably as they cool, so add a splash of water or vegetable broth when reheating and stir over medium-low heat until loose again — this takes about three minutes on the stovetop or two minutes in the microwave with a damp paper towel over the bowl. For the freezer, portion them into a silicone ice cube tray or small freezer bags and freeze for up to three months. Thaw overnight in the fridge or go straight from frozen to a covered pan on low heat with a few tablespoons of liquid.

Vegan Refried Beans (Frijoles Refritos)

Equipment
- 12-inch skillet or sauté pan (heavy-bottomed or cast-iron preferred)
- Potato masher or sturdy fork
- Wooden spoon or heatproof spatula
- Chef’s knife and cutting board
- Measuring cups and spoons
- Colander
- Citrus juicer (optional)
- Immersion blender (optional, for extra-smooth beans)
Ingredients
For the Refried Beans:
- 2 tablespoons avocado oil choose a neutral, high-heat oil; organic when possible
- 1 small white onion, finely diced about 1 cup; choose firm, fresh onion for sweetness
- 1 piece jalapeño pepper, seeded and finely chopped leave some seeds for more heat, if desired
- 3 cloves garlic, minced freshly minced for best aroma
- 1 teaspoon ground cumin toast whole seeds and grind for superior flavor (e.g., Spice House, Burlap & Barrel)
- ½ teaspoon dried Mexican oregano, crumbled prefer Mexican oregano for its citrusy, floral notes
- ½ teaspoon smoked paprika optional, for gentle smokiness
- 2 cans pinto beans 15 oz each, drained and rinsed; Rancho Gordo recommended if cooking from dry
- 1 ¼ cups low-sodium vegetable broth plus more as needed; or use reserved bean cooking liquid for extra body
- 1 piece bay leaf optional; lends a soft herbal backbone
- 1 teaspoon kosher salt, divided start with 3/4 tsp; adjust to taste
- ¼ teaspoon freshly ground black pepper
- 2 tablespoons nutritional yeast optional; adds savory depth and gentle cheesiness
- 1 tablespoon fresh lime juice from about 1/2 lime; add more to taste
- 2 tablespoons finely chopped cilantro stems leaves reserved for garnish; stems pack aromatic punch
- 1 tablespoon refined coconut oil or additional avocado oil optional, for extra richness and glossy finish
For the Garnishes (Optional):
- ¼ cup chopped cilantro leaves fresh and vibrant
- ¼ cup pickled red onions for bright acidity and color
- 2 tablespoons toasted pumpkin seeds (pepitas) adds crunch and nuttiness
- 4-6 slices radishes, thinly sliced peppery snap; use breakfast radishes if available
- 1 bottle hot sauce to taste; Mexican-style preferred
Instructions
- Preheat the Pan: Set a heavy 12-inch skillet over medium heat until the surface is hot but not smoking, about 2 minutes (roughly 350°F/175°C).
- Sweat the Aromatics: Add 2 tablespoons avocado oil, then the diced onion and a pinch of salt. Cook, stirring occasionally, until translucent with light golden edges and sweet aroma, 6–7 minutes.
- Add Chile and Garlic: Stir in the chopped jalapeño and cook 2 minutes until bright and softened. Add minced garlic and cook 30–45 seconds, just until fragrant—do not brown.
- Bloom the Spices: Sprinkle in cumin, Mexican oregano, and smoked paprika (if using). Stir constantly for 30 seconds to bloom in the hot oil; spices should smell toasty and vivid.
- Introduce Beans and Liquid: Add the pinto beans, bay leaf, and 1 cup of the vegetable broth (reserve the remaining 1/4 cup). Bring to a gentle simmer, 2–3 minutes, targeting 185–195°F (85–90°C).
- Mash and Reduce: Lower heat to medium-low. Using a potato masher, mash beans to your preferred texture—chunky for rustic, smoother for spreadable. Stir frequently as the mixture thickens and glossy bubbles appear, 8 minutes. If it tightens too much, splash in the remaining 1/4 cup broth (or a bit more), 1–2 tablespoons at a time.
- Season and Enrich: Remove the bay leaf. Stir in nutritional yeast (if using) and 1 tablespoon refined coconut oil or a little more avocado oil. Season with 3/4 teaspoon kosher salt and the black pepper; cook 2 minutes more to marry flavors.
- Brighten and Finish: Off the heat, fold in lime juice and chopped cilantro stems. Taste and adjust salt or lime. For ultra-smooth beans, briefly blend 1 cup with an immersion blender and fold back in for a creamy finish.
- Rest and Hold: Let beans stand 3–5 minutes to set. To hold for service, keep warm over low heat around 170°F/75°C with a splash of water or broth to maintain silkiness.Texture Cues: Perfect refried beans should be thick yet spoonable, with a glossy sheen and soft, tender bite—no chalkiness.
Notes
Mary’s Tips:
- Oil Choice: Avocado oil gives a clean, buttery richness reminiscent of traditional lard without any animal products.
- Smoky Depth: If you don’t use smoked paprika, add a tiny splash of liquid smoke at the end (1–2 drops) for a campfire whisper.
- Bean Options: Black beans yield a sleeker, slightly sweeter profile; pintos are classic and fuller-bodied.
- Faster Browning: Add a micro pinch of baking soda (about 1/16 teaspoon) to the onions to accelerate browning—stir constantly and watch closely.
- No Masher? Use the bottom of a sturdy mug or a large fork. For smooth beans, an immersion blender works, though you’ll lose a bit of rustic texture.
- Low-Sodium Strategy: Salt in layers; if using salted broth, start with less salt and adjust at the end.
- Make it Cheesy: A tablespoon of mellow white miso can replace nutritional yeast for umami and creaminess (stir in off heat).
- Use the bean liquid (aquafaba) sparingly to loosen; it adds body and sheen. For a subtle smoky note without paprika, char the jalapeño over an open flame before chopping.
Serving Suggestions:
Spoon beans into a warm shallow bowl, smoothing the surface with the back of a spoon. Drizzle with a thin ribbon of oil, then shower with cilantro leaves, pickled red onions, radishes, and toasted pepitas. Serve alongside warm corn tortillas, lime wedges, and a crisp lager or agua fresca. Perfectly prepared beans will look satin-glossy with gentle ripples and release a warm, cumin-lime aroma.Culinary Context:
Frijoles refritos—literally “well-fried beans”—are a cornerstone of Mexican home cooking. While lard is traditional, plant-based fats create a beautiful alternative that lets the beans’ terroir sing. My earliest memory of this dish is learning to bloom spices in my mentor’s kitchen; that single step transformed good beans into a hauntingly aromatic staple I return to weekly.Optional Advanced Instructions:
- Cook Beans From Dry: Soak 1 pound dried pinto beans 8–12 hours. Drain, cover with fresh water by 2 inches, add 1/2 onion and 2 smashed garlic cloves. Bring to a boil, then simmer gently at 185–205°F (85–96°C) until tender, 1 hour 15 minutes to 1 hour 30 minutes. Salt to taste in the final 10 minutes. Reserve at least 2 cups cooking liquid for the recipe.
- Pressure Cooker: No soak needed—cook 1 pound dried pintos in 6 cups water with aromatics on High Pressure for 35 minutes; natural release 15 minutes, then quick release.
- Make-Ahead: The refried beans keep 5 days refrigerated. Reheat gently with a splash of broth or water over low heat (170–180°F / 75–82°C), stirring until silky.
- Parallel Prep: While onions sweat (Step 2), prepare garnishes and warm tortillas to streamline service.
Nutrition
FAQ
Can I use canned beans instead of dried?
Yes, canned beans work well and are what most people use on a weeknight. Drain them but save the liquid from the can — it has enough starch to help with texture. One 15-ounce can is roughly equivalent to 1.5 cups of cooked dried beans.
How do I know when the beans are done?
The beans are ready when they hold their shape on a spoon without spreading immediately but still smear easily when pressed. If they look wet and soupy, cook for another two to three minutes; if they’re cracking at the edges of the pan, add a tablespoon of liquid and pull them off the heat.
Can I make these without oil?
You can, but the texture and flavor will be different — drier and less cohesive. If you need to avoid added oil, use a splash of vegetable broth in a nonstick pan and expect a result closer to mashed beans than traditional refried beans.
Try these next
- Crispy Bean Corn Tostadas
- Smoky BBQ Jackfruit Tacos
- Vegan Breakfast Burrito Bowl
- Southwestern Quinoa Salad